
In this article we will go through the basic steps on how to install and use the Selenium IDE plugin for testing your website.
Article Agenda:
- Install the Selenium IDE
- Record your first test case
- run your first test case and see the results
- Create and edit test cases manually
- Save test cases & test suits
- Load & run test suits
- More About Target Locators
- More Commands
Install the Selenium IDE
The first thing you need to do is installing the Selenium IDE. The Selenium IDE is a plugin for Firefox which is not available in the add-ons manager. You need to download and install it manually.
Since you want to install a Firefox plugin, you should perform all of the following steps in your Firefox browser.
- First click to download/install the latest version of the Selenium IDE (2.9.0) here.Or go to http://www.seleniumhq.org/download/, scroll down to “Selenium IDE” and click on the link to download/install the latest released version.
- If your Firefox browser tells you, that it prevented the site to install software on your computer, click “allow”.

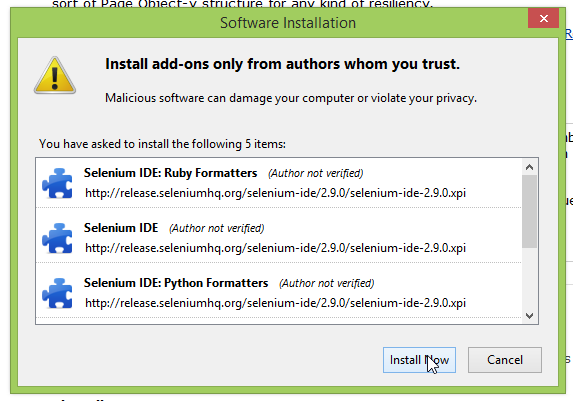
- When the next window “software installation” pops up, click on “install now” to install the different parts of the Selenium IDE.
- Restart your browser.
- Now you should see the icon of the Selenium IDE in your toolbar.

Record your first test case
- If you have not already, open your Firefox browser.
- Navigate to google.com. We will use this site for our sample test case.
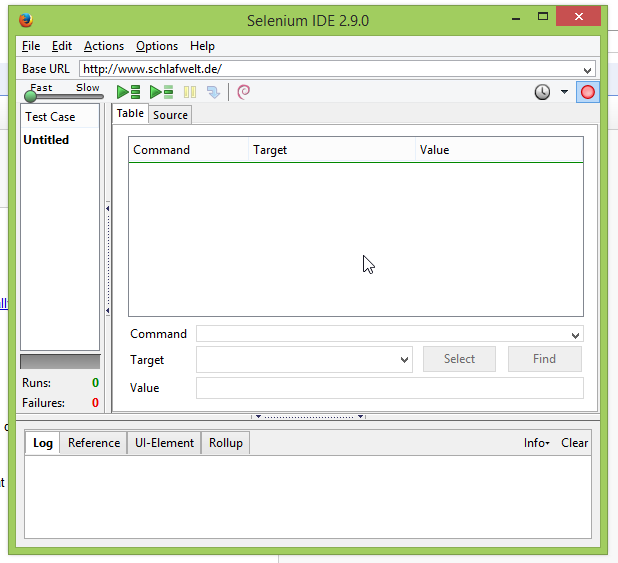
- Click on the Selenium IDE icon in the toolbar.
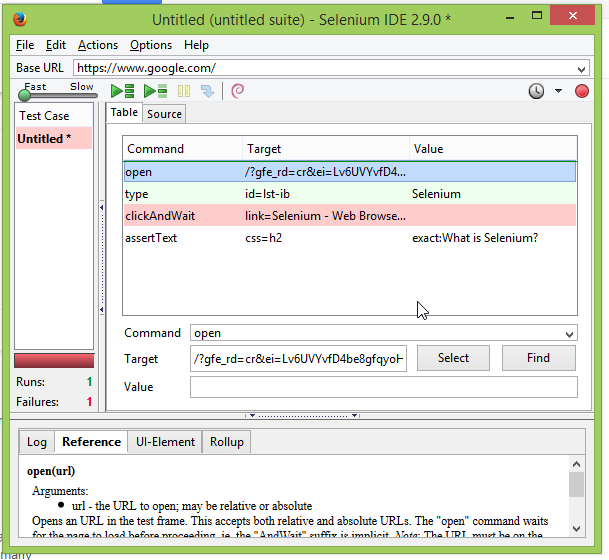
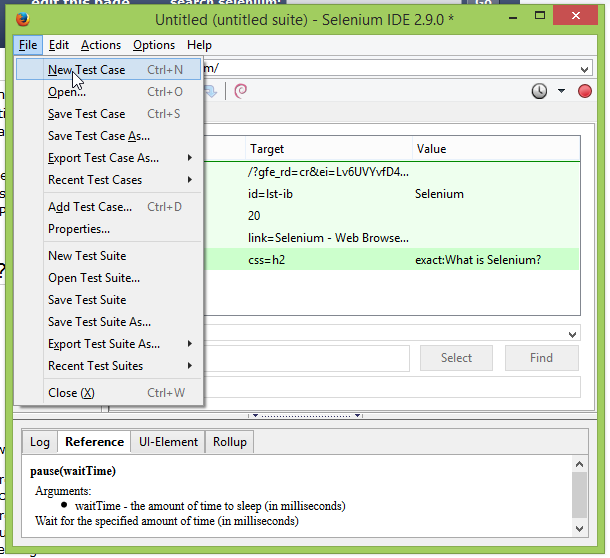
- The Selenium IDE opens and should look like this:
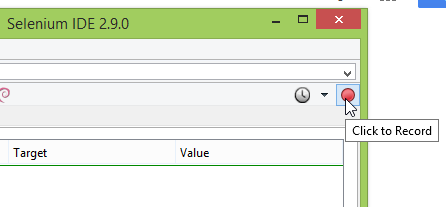
- If it is not activated already, click the record button to start recording your actions on the website.
- Now in the browser window, click in the search input field and type: “Selenium”
- Hit Enter
- Click on the first search result (“Selenium – Web Browser Automation”)
- Right-Click on the headline “What is Selenium?” to open the context menu.
- In the context menu go to “Show All Available Commands” > “assertText: css=h2 exact:What is Selenium?” and click on it.
- Switch to the Selenium IDE window. It should now look something like this:

- Congrats: You recorded you first test case, which tests if the headline on the page of the first test result when you search at google.com for “Selenim” is “What is Selenium?”
Run your first test case and see the results
- You should still have the Selenium IDE open with the just recorded test case.
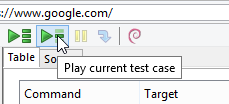
- Click the second green play button in the toolbar to play the current test case.
- Probably the test run will fail and look like this:
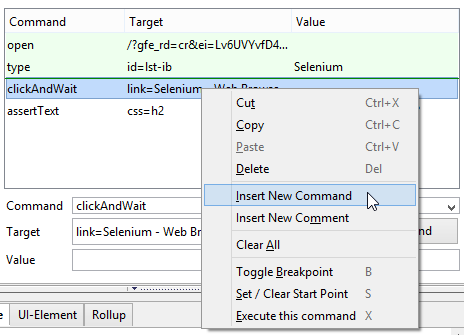
- So what is going wrong here? The second step that we recorded is to type in “Selenium”. The next step ist to click on the first search result. The Selenium IDE tries to perform the third step directly after the second step, but google.com needs a little time to load the search results before we can click on it. The Selenium IDE “thinks” that the desired link is not there and that is why the third step fails.
- Fix: We give Google a little time to load the search result before we click on it. To do this do a right click on the third command and in the context menu choose “Insert New Command”.
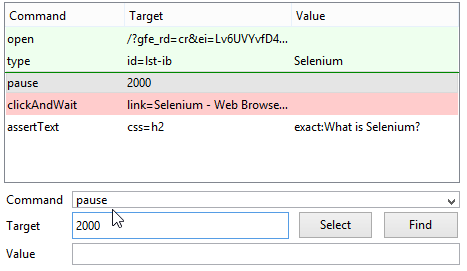
- Type (or select from the list) in the Command-Field “pause” and in the Target-Field 2000. That will pause the test execution for 2000 millisecond = 2 seconds. That should be plenty of time for Google to load the test results.
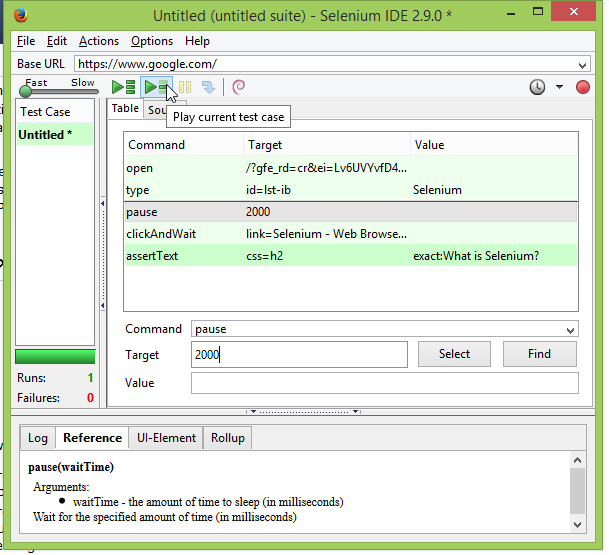
- Hit the play button again.
- The test case should pass now and the Selenium IDE should look something like this:
Creating Test Cases Manually
If you prefer not to record the single test steps but to define them manually, please read through the next example. We will Test if we can search on Wikipedia for “Banana” and if the Headline of the page is “Banana”.
To understand this part of the tutorial you will need a basic understanding of HTML!
- Creat a new test case by clicking on “File > New Test Case” (or pressing Ctrl + N).
- Click in the first row and then type in the Command-Field: “open”. Type in the Target-Field: “https://en.wikipedia.org/wiki/Main_Page”
- After every command you add to the test case, you should hit the “Play current test case”-Button (the second green arrow) to see if your test case works so far.
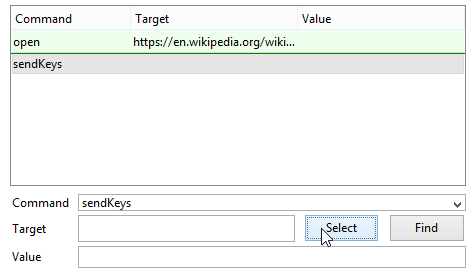
- Click in the second row and type in the Command-Field or select from the Command-List: “sendKeys”
- Then, next to the Target-Field, click on “Select”.
- Klick on the search box of Wikipedia.
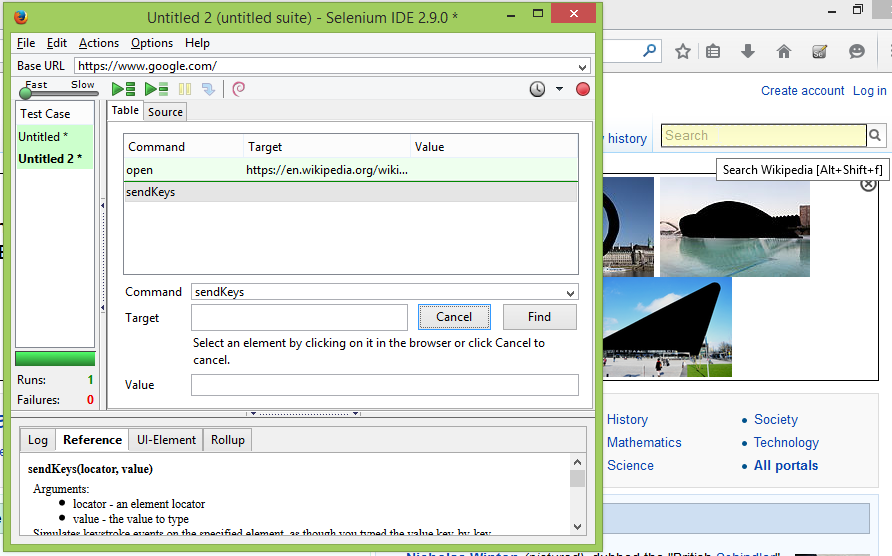
- In the current Target-Field should appear “id=searchInput”. This is the locator which identifies the element on which we want to use the current command.
- Type in the Value-Field: “Banana”
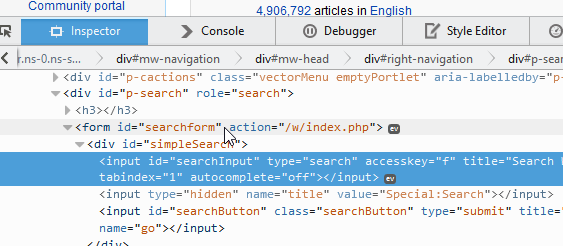
- To execute the search, we need to submit the form of the search input field. The easiest way to locate an element on a web page is a unique id. To find out whether the wrapping form of the search input field has a unique id, right click on the search field and choose “Inspect Element” in the context menu.
- The developer tools open and we can inspect the html code. Here we see that the wrapping html-form has a uniqe id: “searchform”.
- With this information add the next command: submitAndWait with the target: “id=searchform”. We are choosing submitAndWait as an alternative to add “pause” again, sothat the Selenium IDE will wait for the page to load before continuing with the next test step.
- Add one more command: assertText, use the “Select”-Button next to the target field again to fill in the target by clicking on the headline “Banana” of the Wikipedia page. Type in the Value-Field “Banana”.
- Run the test case. The result should look like this:

Save test cases & test suits
- Go to File > Save Test Case As… to save the current test case.

- Double-click on your second test case and save as well.
- Go to File > Save Test Suite As… to save the whole suite (the collection of your test cases).
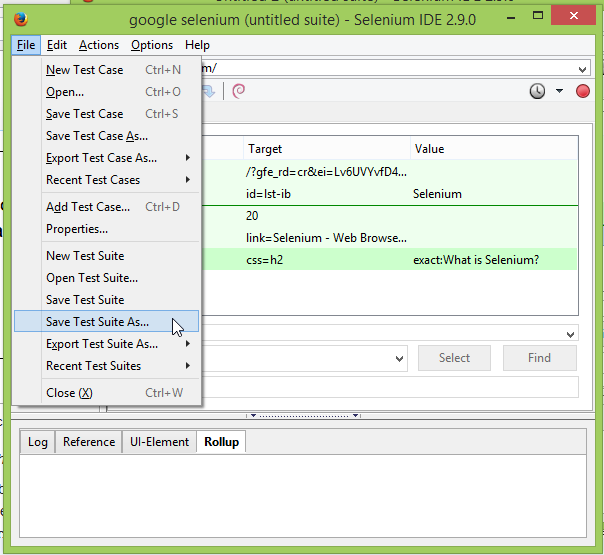
- Now you can close the Selenium IDE and Firefox without loosing your work. Everything is safe.
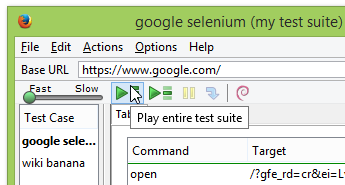
Load & run test suits
- Open Firefox again and open the Selenium IDE by clicking the icon in the toolbar.
- Go to File > Open Test Suite…
- Browse to the location where you saved your test suite, select it and press “open”.
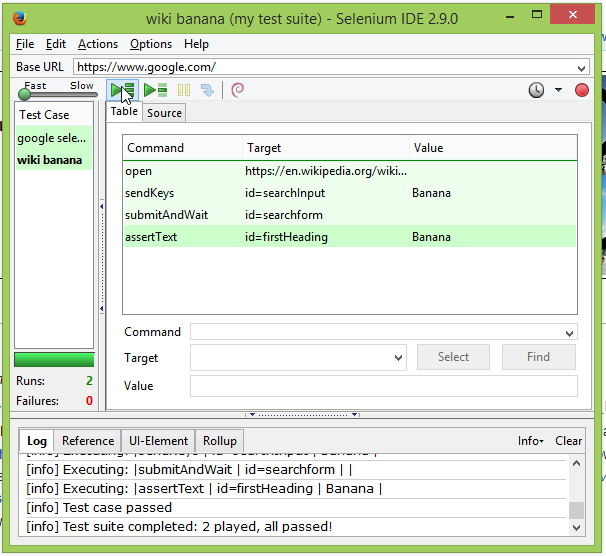
- To run the whole suite (all test cases in the suite) click on the first green arrow:
- Now the Selenium IDE will execute one after another all test cases that are in your current test suite. The result should look like this (only the names might differ depending on the names you chose for your test cases when saving them):
More About Target Locators
For most commands you need to use a locator in the Target Field of the Selenium IDE to tell the tool on which element of the web page the command should be used. There are four different ways to locate elements (which are the same for the Selenium IDE and FRET) that are explained here.
More Commands
In this tutorial you already used the some important commands:
- open
- type
- pause
- clickAndWait
- assertText
- sendKeys
- submitAndWait
There are various more commands to simulate all kinds of different user interactions with a website. We are working on a command reference and until then please refer to seleniumhq.org and the Selenium Documentation.
- When the next window “software installation” pops up, click on “install now” to install the different parts of the Selenium IDE.
For the first example, pressing Enter after typing Selenium in the search box does not seem to work when it is run. Perhaps it is the auto-suggestions being generated? Clicking the search button instead worked fine.